-
3 Creative Ways to Use a Loved One’s Clothing
Handcrafted Keepsakes to Hold Close to the Heart
When someone we love has passed or is no longer near, their clothing can hold powerful memories. A favorite shirt, a cozy flannel, or a delicate blouse can instantly bring back a moment, a scent, or a feeling of being close to them again.
Over the years, I’ve had the honor of helping families turn these meaningful pieces into keepsakes they can see, touch, and treasure. If you’re wondering what to do with a loved one’s clothing, here are three heartfelt ideas to consider:
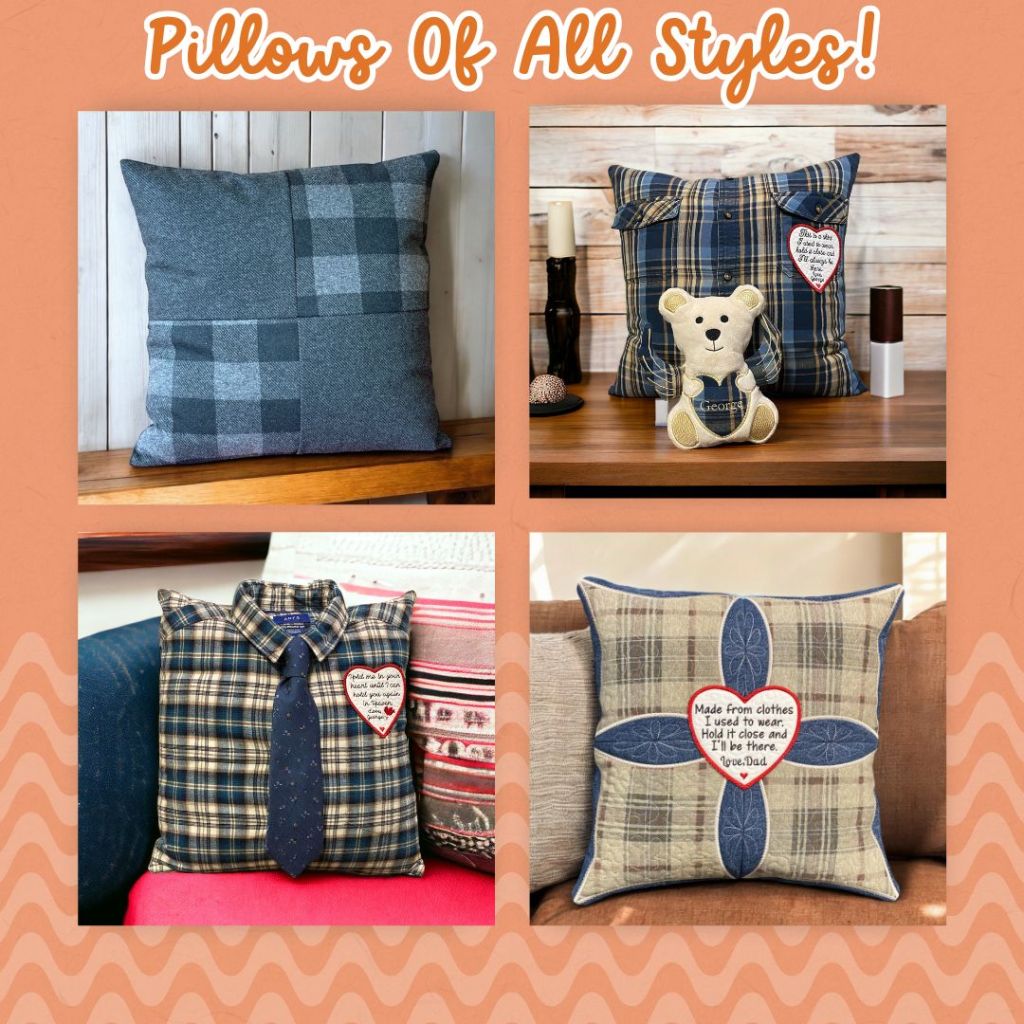
1. Memory Pillows – A Hug You Can Hold
A memory pillow offers warmth and comfort in the simplest form. Using a favorite shirt, sweatshirt, or even a nightgown, these pillows can be personalized with embroidery—like a name, a special date, or a favorite quote.
Whether placed on a couch, bed, or reading chair, they often become the most hugged item in the house. They’re a beautiful way to keep someone close.
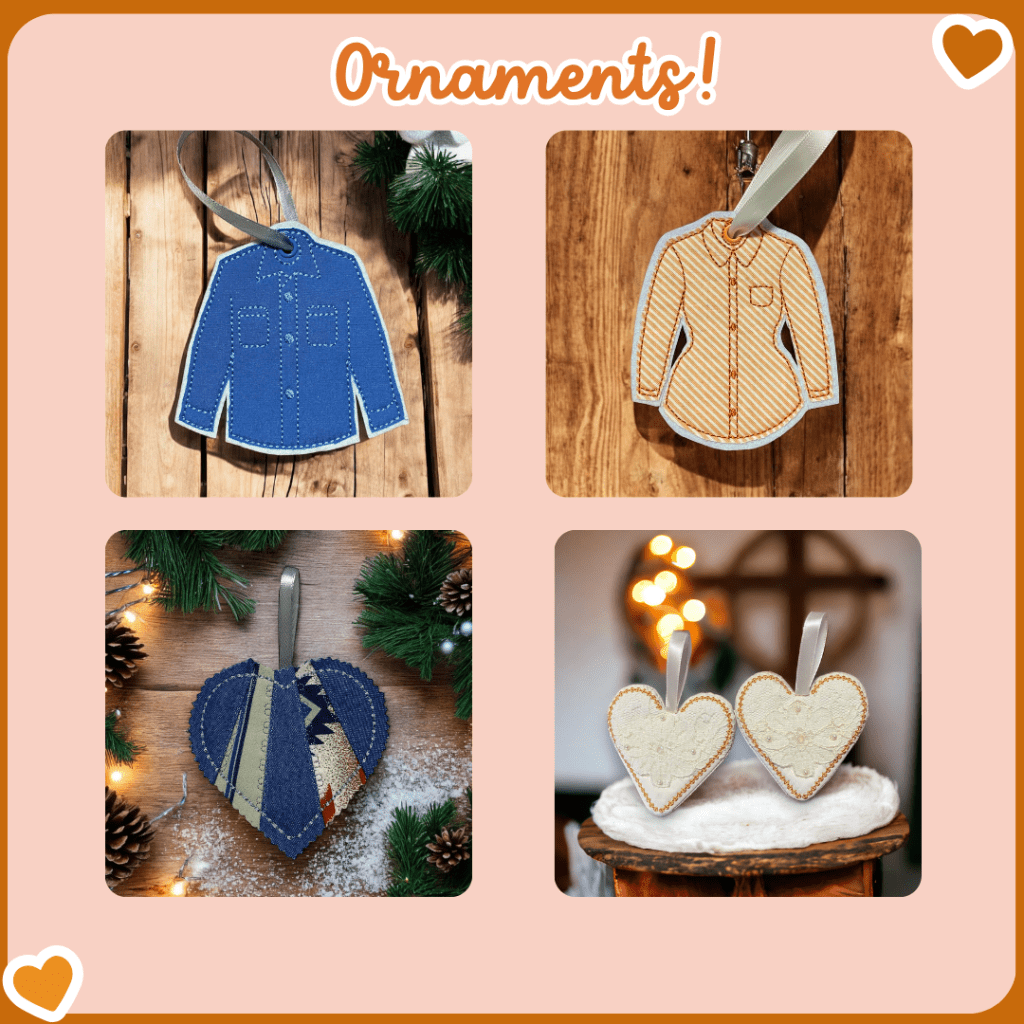
2. Memory Ornaments – Small, But Full of Love
Memory ornaments are perfect for sharing a piece of someone special with the whole family. Whether it’s a holiday tradition or a keepsake to hang all year round, these little treasures are made from meaningful scraps—lace from a wedding dress, a tie from Dad, or a piece of Grandma’s apron.
They make thoughtful gifts and become part of family traditions that can be passed down through generations.
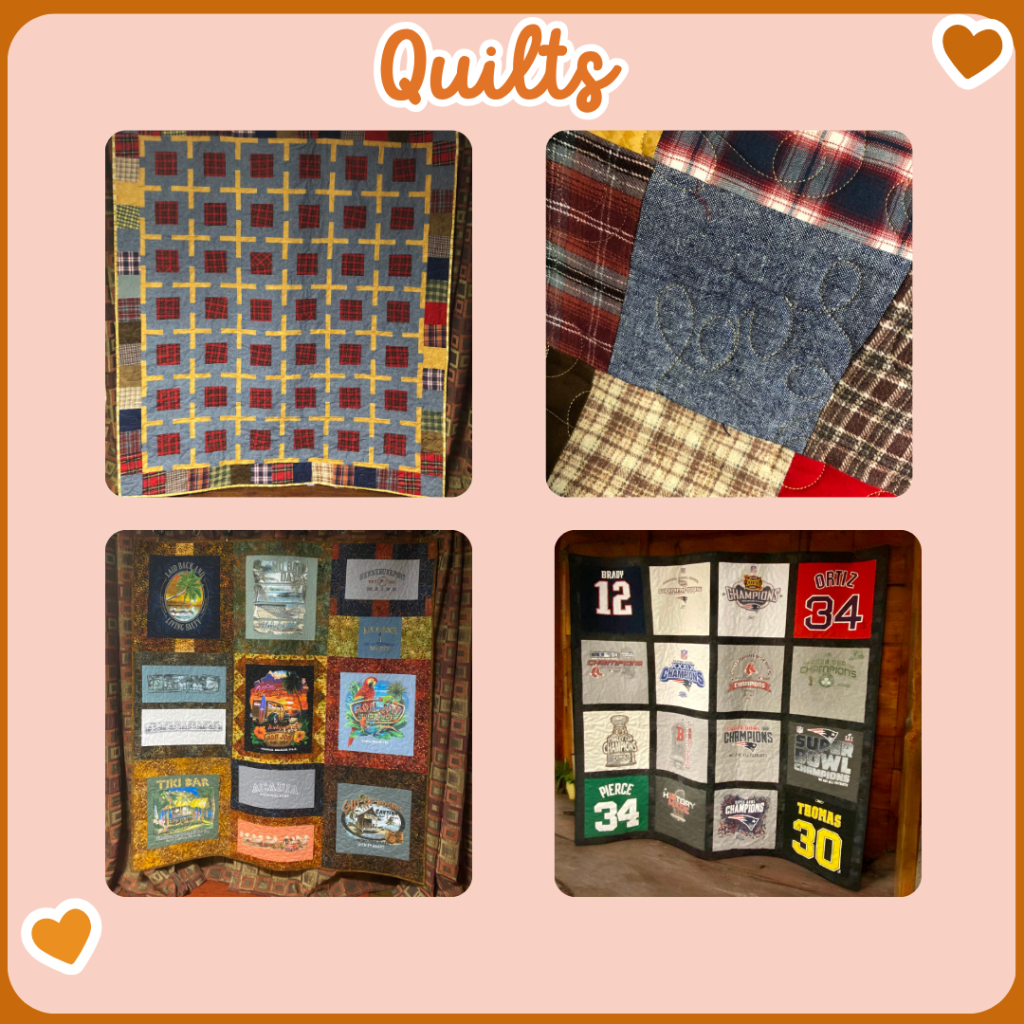
3. Memory Quilts – A Story Told in Stitches
A memory quilt is a beautiful way to bring many pieces together—quite literally. Shirts, pajamas, dresses, and even handkerchiefs can be turned into quilt blocks that tell the story of a life well-lived. They are even great to celebrate graduations or sports accomplishments…you name it!
These quilts offer warmth in more ways than one. They’re often used for snuggling, displayed on a bed or couch, or passed down as heirlooms that wrap future generations in love.
Every Stitch Holds a Memory
Each piece I create is made with intention and care, knowing it holds a special place in someone’s heart. Whether you’re ready now or still holding on to that bag of clothing tucked away in the closet, just know—when the time is right, there’s a beautiful way to preserve those memories.
If you have a special item of clothing and want to explore the possibilities, I’d love to chat. Together, we can create something meaningful and lasting.
Happy Stitching!
Allison -
March Block of the Month – A Heartfelt Creation!
March’s Block of the Month is here, and I had an absolute blast making this one! This block is extra special because of the gorgeous heart right in the center—it immediately reminded me of the heart in my home. There’s something so wonderful about sewing a design that carries so much meaning.
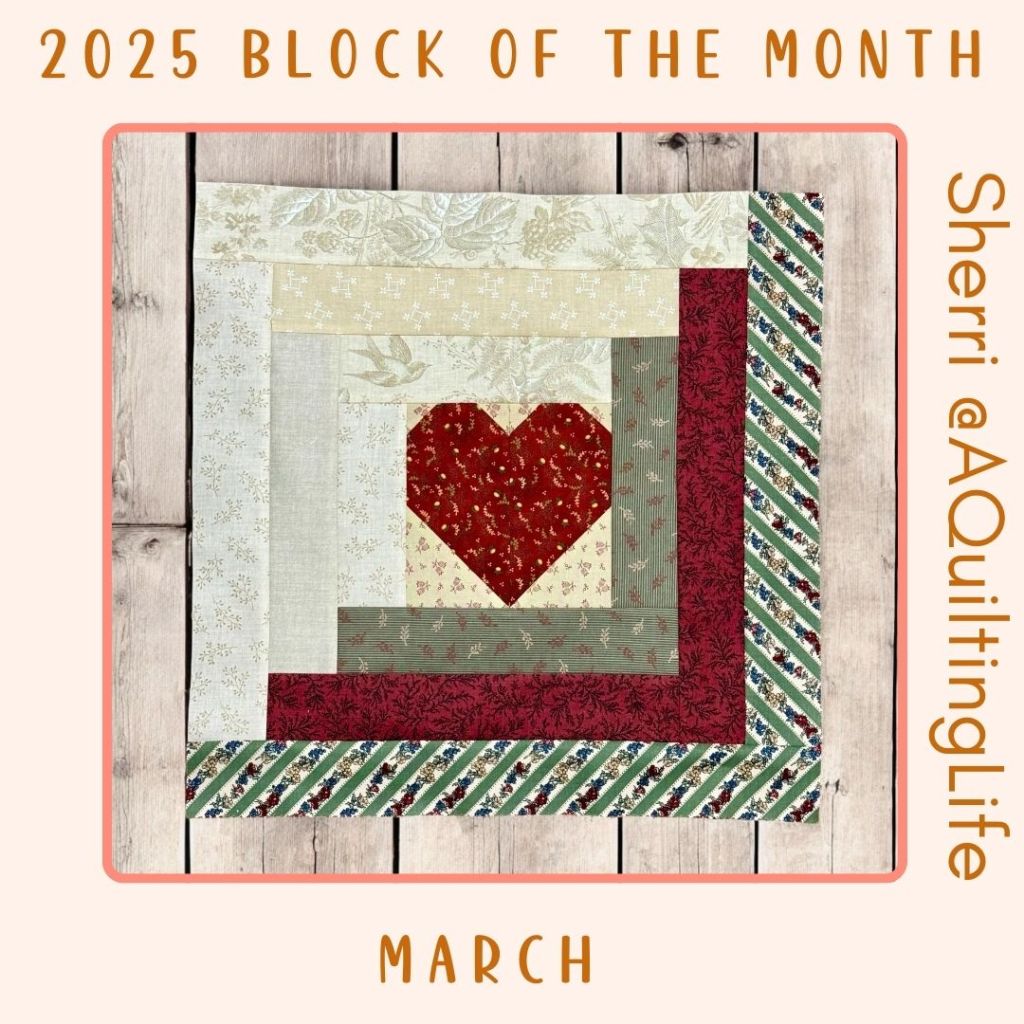
Are you participating in the 2025 Block of the Month hosted by the amazing Sherri at A Quilting Life? If not, it’s never too late to jump in! It’s completely free, and each month brings a new block that challenges and inspires.
I’d love to hear all about your BOM journey! What colors are you using? Are you trying something new with fabric placement? Share your progress in the comments or tag me on social media so we can cheer each other on.
I can’t wait to see what April’s block brings, but for now, I’m going to sit back and admire this heart-filled beauty.
Happy quilting! 🧵💖
-
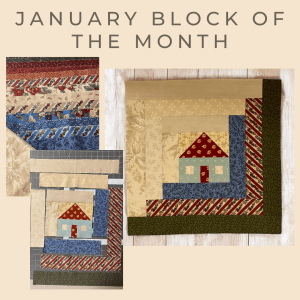
February Block of the Month – Learning and Growing!

February’s Block of the Month is complete, and while I probably could have created better contrast, I’m embracing this as a learning experience! Quilting is just as much about growth as it is about creating, and each block is an opportunity to improve and explore new techniques.
This BOM is hosted by the talented Sherri at A Quilting Life, and the best part? It’s completely free! If you haven’t joined yet, it’s never too late to start. Each month brings a fresh design, new challenges, and a chance to sew along with a wonderful quilting community.
Despite my thoughts on contrast, I’m happy with how my February block turned out. It’s always fun to see how color choices and fabric placement impact the final design. If you’re working on yours, I’d love to see it! Share your progress in the comments or tag me on social media.
I’m already looking forward to March’s block and can’t wait to see what’s next in this journey. Whether you’re following along with the BOM or working on your own projects, remember—every stitch is a step forward!
-
New Year, New Project!
I couldn’t resist joining the 2025 Block of the Month hosted by the amazing Sherri at A Quilting Life! It’s completely FREE (and let’s be honest, who doesn’t love free quilting fun?) and only ONE block per month.
Now, should I really be starting a new project? 🤔 Absolutely not. 😂 But hey, it’s only one block a month—how hard could it be? (Famous last words, right?)
This is the perfect chance to try new techniques, stay inspired throughout the year, and connect with a community of fellow quilters. 🪡💬 Plus, it feels so satisfying to watch a quilt come together one step at a time.
If you’ve been thinking about adding a little joy and creativity to your 2025, join me! Let’s quilt along and have some fun. 🌟
Are you starting any new quilting projects this year? Drop a comment—I’d love to hear all about them! ❤️
-
Welcome 2025!
A Year of Creativity, Quilting, and Connection!
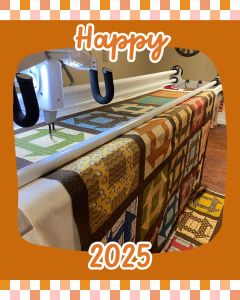
Happy New Year, everyone! I know we are actually in the middle of January, but to me, as long as it is January it is okay to say Happy New Year! As the calendar turns to 2025, I’m thrilled to kick off another exciting year of quilting and sewing adventures with all of you. I am determined to “Get My Blog” back! This blog is where passion meets precision, where creativity finds expression, and where cherished memories take tangible form through every stitch.
What to Expect in 2025
This year, I’ll be bringing you weekly posts filled with inspiration, insights, and invaluable tips for all things quilting and sewing. Here are just a few highlights of what’s in store:
- Behind-the-Scenes Projects: Follow along as I create memory quilts, pillows, bears, and more. I’ll share the stories behind the pieces and how they come to life.
- Tips and Tricks: From perfecting your seams to creative ways to repurpose clothing, I’ll offer advice to help make your projects shine.
- Fun Challenges: Let’s sew along together! Whether it’s a seasonal quilt or a quick weekend project, we’ll stay inspired.
- Tools of the Trade: Discover my favorite gadgets and tools that make quilting and sewing a joy.
- Memory Crafting: Learn how to turn cherished clothing into keepsakes that preserve love and history for generations.
Looking Ahead
I’m setting my sights on making 2025 my most productive and creative year yet. Quilting has always been about more than fabric and thread; it’s about connection—to our past, to our loved ones, and to a community of crafters who share the same love for this timeless art.
If you’re a seasoned pro or just dipping your toes into the world of sewing, I’d love to hear from you. Let’s make this space interactive! Share your questions, ideas, or even your own projects. Together, we’ll turn inspiration into action.
Stay Connected
Be sure to subscribe to the blog so you never miss a post. Follow me on social media for even more updates, sneak peeks, and real-time progress on my projects. Let’s connect, create, and celebrate the joy of crafting all year long.
Here’s to an incredible 2025 filled with stitches, stories, and success. I’m so excited to embark on this journey with you!
Happy quilting and sewing!
Allison
-
Memory Quilt – Binding Options

There are several ways to bind a quilt, and the method you choose depends on your preference and the look you want to achieve. Here are a few common methods for binding a quilt:
- Double-Fold Binding: This is the most traditional and widely used method. It involves cutting fabric strips, usually 2.5 inches wide, and joining them to create a long continuous strip. The strip is then folded in half lengthwise and pressed. The raw edges of the binding are sewn to the front of the quilt, and then the folded edge is folded over to the back and hand-stitched in place.
- Single-Fold Binding: This method is similar to the double-fold binding, but instead of folding the strip in half lengthwise, you fold one edge of the strip to the center and press it, then fold the other edge to meet the first fold and press again. The binding is then sewn to the front of the quilt, and the folded edge is turned to the back and machine-stitched or hand-stitched in place.
- Bias Binding: Bias binding is made from fabric that is cut on the bias (a 45-degree angle to the straight grain of the fabric). Bias binding is more flexible and can be used for quilts with curved edges. The process of attaching the bias binding is similar to the double-fold binding method.
- Flange Binding: Flange binding adds a decorative flange or accent between the quilt top and the binding. It involves attaching a narrow strip of contrasting fabric to the quilt top before attaching the binding. The binding is then sewn to the back of the quilt, folded over to the front, and machine-stitched close to the seam between the flange and the binding.
- Prairie Points Binding: Prairie points are folded fabric triangles that are sewn into the binding, creating a decorative edge. This method requires cutting and folding individual triangles and sewing them into the binding before attaching it to the quilt.
- Pillowcase Binding: This method is often used for smaller quilts or quilted projects like table runners or placemats. It involves sewing the quilt with the right sides facing and leaving an opening. After turning the quilt right side out through the opening, the raw edges of the opening are folded in and hand-stitched closed, creating a finished edge.
Remember to take your time and experiment with different binding methods to find the one that works best for your quilt and desired aesthetic.
I use option 1 above, double-fold binding and in the next post, I will cover hand-stitching and machine stitching the binding.
Happy stitching!
-
Memory Quilt – Quilting
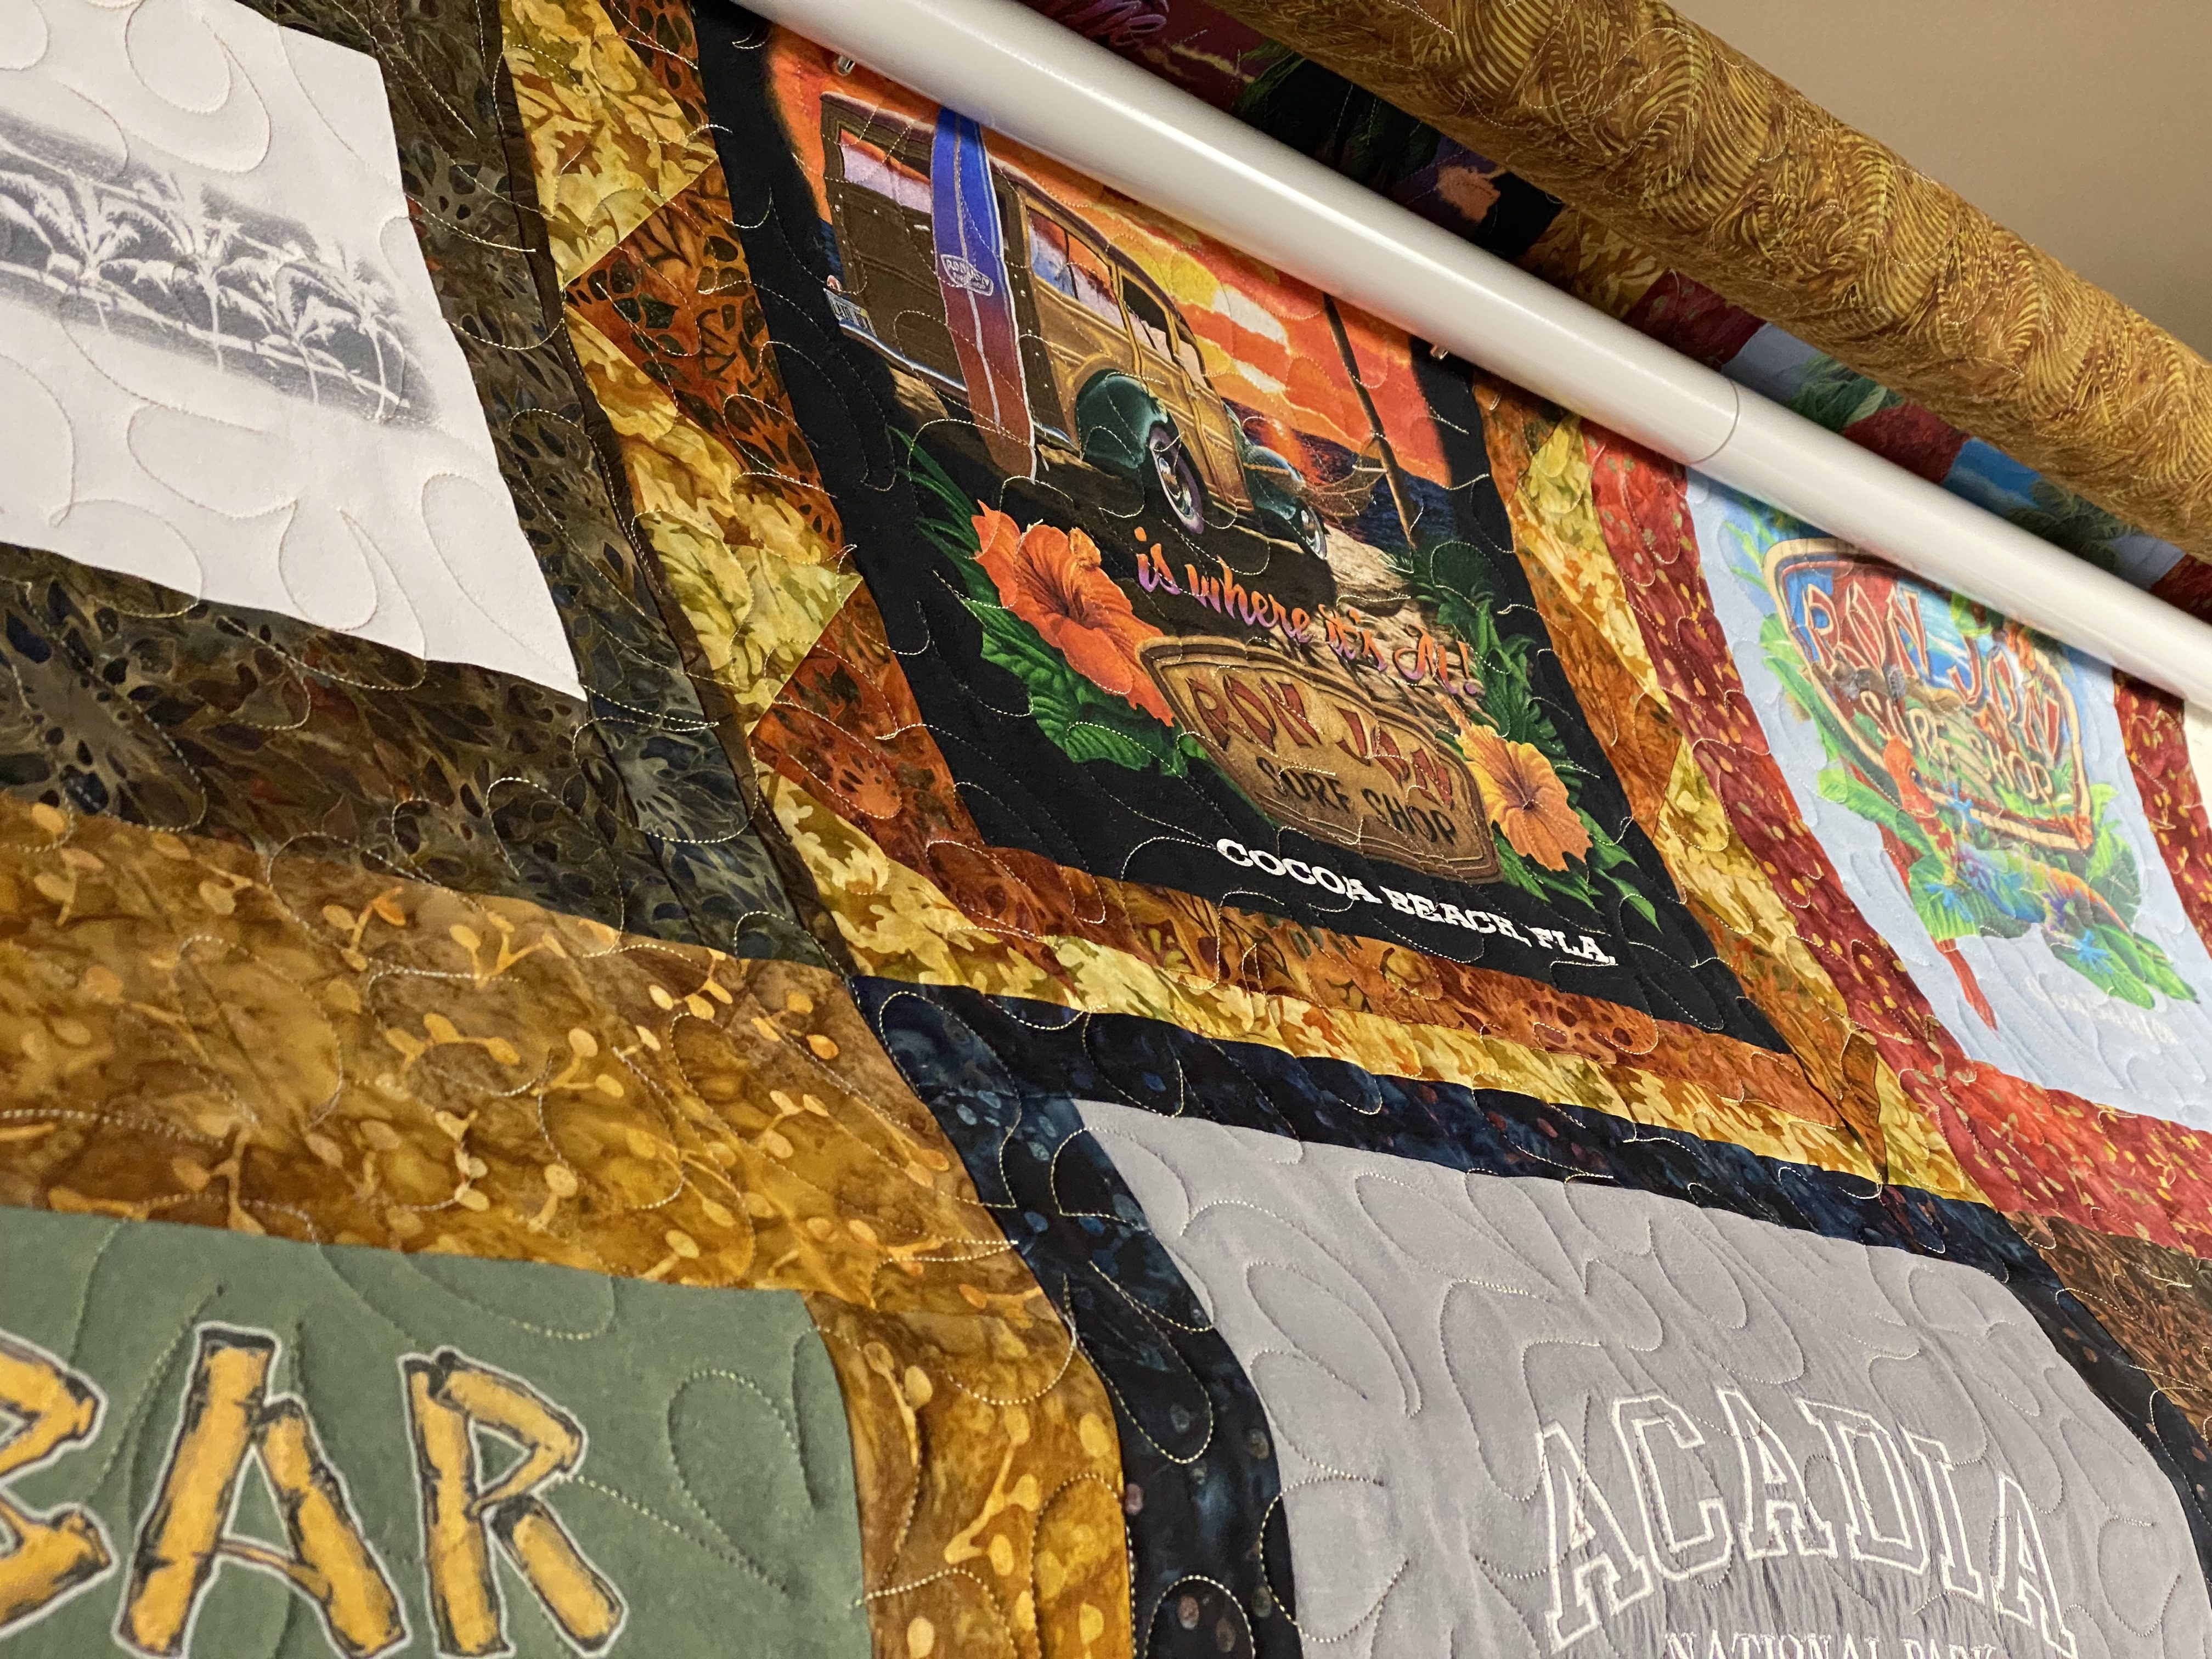
Quilt On Longarm Frame Quilting a quilt involves the process of stitching the quilt top, batting, and backing together. Here are the general steps to quilt a quilt:
- Choose your quilting method:
- Decide on the quilting method you prefer, such as hand quilting, machine quilting, or longarm quilting. Each method has its own considerations and techniques.
- Prepare your quilt layers:
- Ensure that your quilt top is pressed and flat without any wrinkles or creases.
- Cut your batting and backing fabric to size, leaving a few inches of excess on all sides to accommodate any shifting during quilting.
- If sending to a longarm quilter, please follow their directions for preparation of quilt top and backing. They typically will have guidelines and some also provide the batting.
- Create a quilt sandwich (if hand quilting or free motion quilting on your sewing machine)
- Lay your backing fabric right side down on a large, flat surface (such as a table or the floor).
- Smooth out the backing fabric and secure it to the surface using masking tape or quilting clips to keep it taut and wrinkle-free.
- Place the batting on top of the backing, aligning the edges.
- Finally, place your quilt top right side up on the batting, aligning the edges and ensuring it is centered.
- Baste the layers:
- Starting from the center and working outwards, secure the layers together to prevent shifting during quilting.
- You can use safety pins, basting spray, or hand basting stitches to hold the layers in place. Space your basting stitches a few inches apart across the entire quilt.
- Quilt the layers:
- If hand quilting, use a quilting hoop or frame to keep the layers taut. Choose a quilting thread and needle appropriate for hand quilting and start stitching along your desired quilting lines or patterns.
- If machine quilting, attach a walking foot or free-motion quilting foot to your sewing machine. Select appropriate quilting thread and begin stitching your desired quilting design, following your marked lines or free-motion quilting as desired.
- Finishing touches:
- After quilting the entire quilt, trim away any excess batting and backing fabric to match the quilt top’s size.
- We will discuss binding in our next session.
Remember to take your time, practice, and experiment with different quilting techniques and designs to achieve the desired result. Quilting can be a meticulous process, so enjoy the journey and celebrate the creation of your unique quilt.
If you are just starting out with free motion quilting you may find Leah Day’s videos extremely helpful and free! Her videos are extremely helpful in relieving your anxiety about free motion quilting. I was extremely fortunate to take a class with Leah and my best advice is to take your shoes off and put the arch of your foot at the top of your pedal. It made a huge difference for me!
Angela Walter’s of Quilting Is My Therapy is another favorite and free resource for both free motion quilting and longarm quilting!
Happy Quilting! See you in the next session where we discuss binding!
- Choose your quilting method:
-
Memory Quilt – Piecing
Piecing together a memory quilt can be a fun and rewarding experience that allows you to create a one-of-a-kind keepsake. Here are some tips for piecing together your memory quilt:
- Arrange the squares: Arrange the squares in the desired pattern or layout, and make sure the colors and patterns are distributed evenly throughout the quilt.
- Sew the squares together: Use a sewing machine or hand-sew the squares together, using a ¼-inch seam allowance. Press the seams flat to reduce bulk. Pressing seams open or to the side is a personal preference. If I am working on a pattern where a lot of points come together, then I press them open, otherwise I press to the dark side.
- Add sashing (optional): If you want to add sashing between the squares, cut strips of fabric the same width as the squares and sew them to the sides of each square before sewing the squares together. You can even get fancy and add cornerstone squares.
- Add borders (optional): Once the quilt top is complete, add borders to the edges of the quilt to frame the design and create a finished look.
Remember, piecing together a memory quilt is a personal process, and the design should reflect your individual style and preferences. Take your time and enjoy the process, and you will end up with a beautiful and meaningful keepsake that you can cherish for years to come.
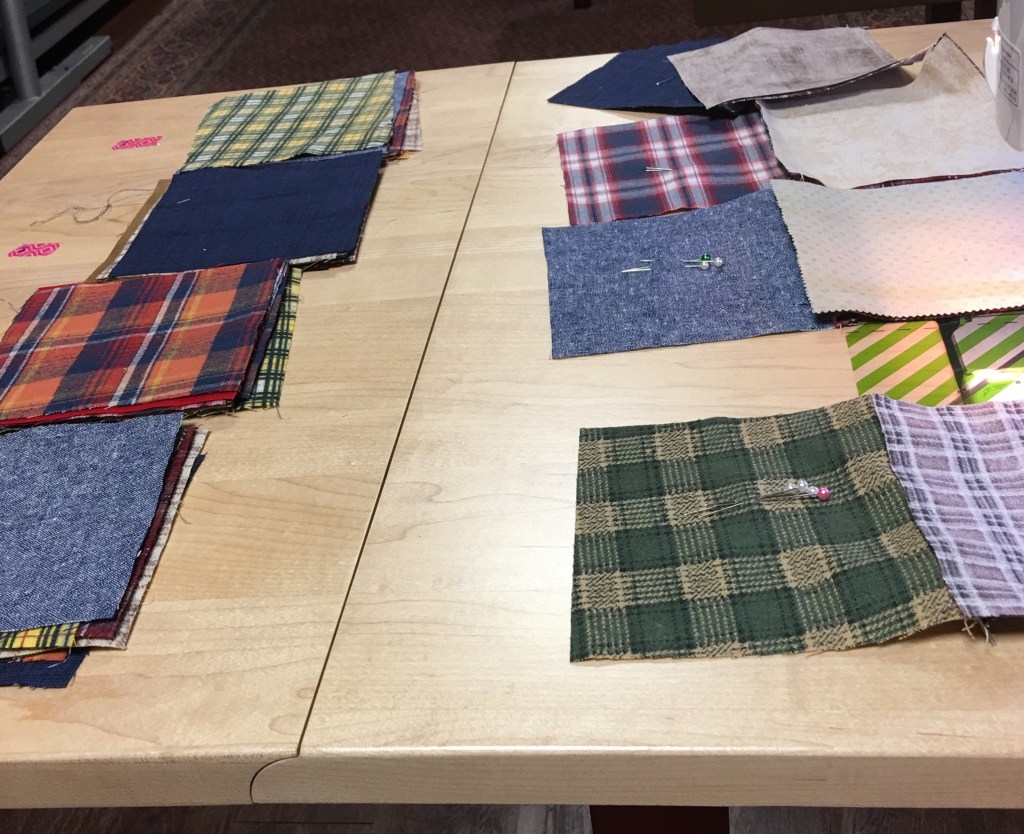
Below are pictures of some of my memory quilts in progress!

-
Memory Quilt – Planning The Layout

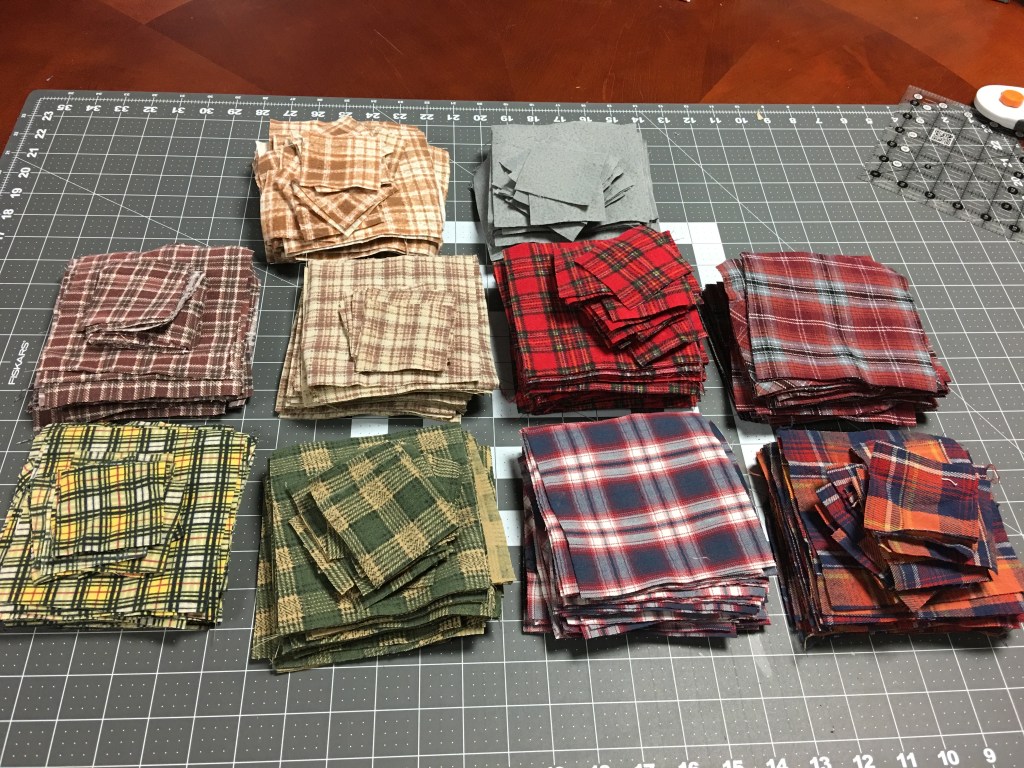
Arranging blocks for a memory quilt can be an exciting and creative process. Here are some tips for arranging your blocks:
- Sort the blocks by color or theme: If you have a large collection of blocks, sort them by color or theme before arranging them. This will help you see how many blocks you have in each color or theme and make it easier to create a balanced design.
- Lay out the blocks on a flat surface: Lay out the blocks on a large, flat surface like a table or floor so you can see how they look together. You can experiment with different arrangements until you find one that you like. I use my cell phone to take pictures of the arrangements, review, and move blocks around.
- Consider the block size: If your blocks are all the same size, you can create a grid pattern by arranging them in rows and columns. If your blocks are different sizes, you can create a more dynamic design by alternating the sizes and shapes.
- Mix and match: Don’t be afraid to mix and match different colors and patterns to create a unique design. You can create visual interest by using contrasting colors or patterns next to each other.
- Add sashing: If you want to create more separation between the blocks, you can add sashing, which is a strip of fabric that goes between the blocks. This can help create a more cohesive design and make the individual blocks stand out.
Remember, arranging blocks for a memory quilt is a personal process, and the design should reflect your individual style and preferences. Have fun with it, and don’t be afraid to experiment until you find the perfect arrangement!
-
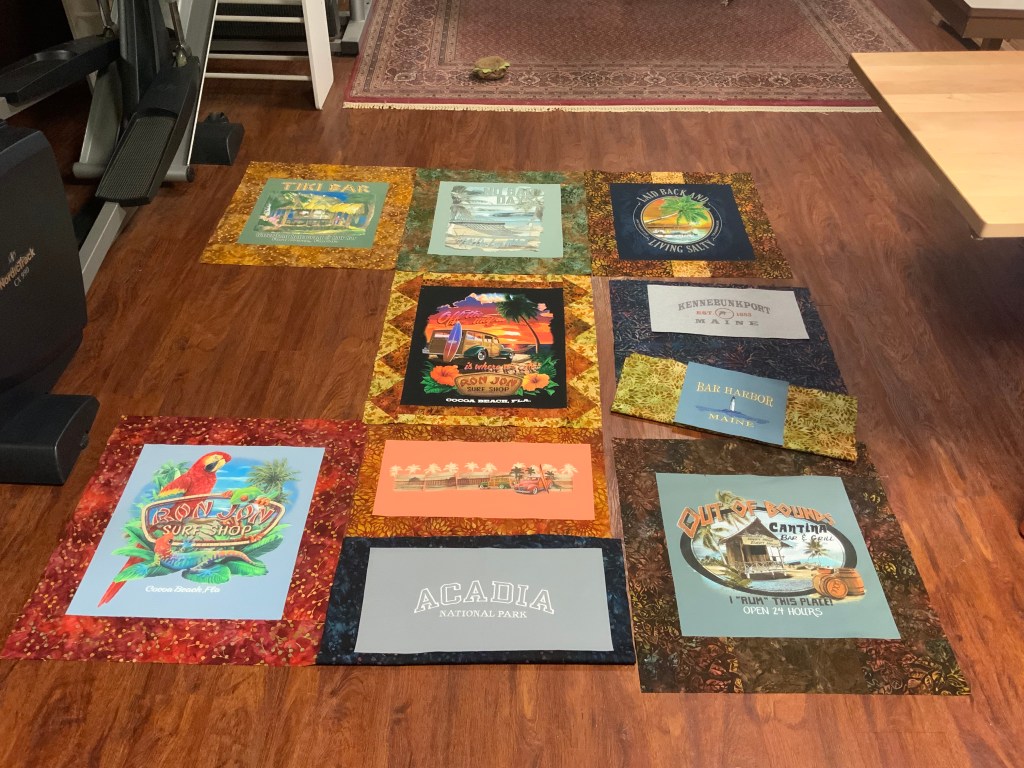
Memory Quilt – Choosing A Design
My last post was on cutting your shirts and there are times when I cut and then plan and other times when I feel like the planning needs to come first. Here we are, back at personal preference so please do what works best for you. This is a creative and flowing process.
There are many different designs you can use for a memory quilt. Some popular options include patchwork (see my photo above), photo quilts, and applique. I have included all of these on some quilts. It truly depends on your preferences and what you have available. You may also want to consider the size and shape of the quilt based on how many items you plan to include. If you don’t have enough memory items (shirts, etc.) then you can plan in additional fabrics to make the size quilt you would like.
Choosing a design for your memory quilt can be a fun and creative process that allows you to showcase your personal style and preserve cherished memories. Here are some steps to consider when selecting a design for your memory quilt:
- Gather your materials: Before you start designing your quilt, gather all the materials you want to include, such as old clothes, photos, buttons, ribbons, and other mementos.
- Determine the size and shape: Consider the size and shape of your quilt, depending on the materials you have collected and the intended use of the quilt.
- Choose a color scheme: Decide on a color scheme that reflects the theme of your quilt or the colors that have significance to you.
- Plan the layout: Experiment with different layout options to showcase the materials you have collected in an aesthetically pleasing way. You can use graph paper or a digital design program to help you plan the layout.
- Consider adding embellishments: Add embellishments like embroidery, appliqué, or quilting to enhance the design of your memory quilt.
- Personalize it: Consider adding personal touches such as a label with your name or a special message to make the quilt truly your own.
Remember, the most important part of designing your memory quilt is to have fun and let your creativity shine!
Some of my favorite memory quilts are:
- Simple patchwork using 5″ squares, which works perfect for dress shirts and is simple for beginners.
- Patchwork or other patterns that bring in a coordinating fabric that brings everything together. I have used a denim that worked perfectly to achieve this coordinated look.
- T-Shirt quilts that include adding additional fabrics that coordinate with the them of the t-shirts.
You can view pictures of my finished quilts on my Memory Quilt page.
